
Where Should a Centered Logo Go on a Shirt?
Ever stared at a blank t-shirt, wrestling with the age-old question: Where should a centered logo go on a shirt? It seems simple enough, but nailing that perfect placement can be surprisingly tricky. Are you tired of misaligned logos, wasted materials, and designs that just don’t quite pop? Many struggle with finding that sweet spot—too high, it looks awkward; too low, and it gets lost. Getting it right is crucial for a professional look and a strong brand identity. This article cuts through the guesswork, providing clear, practical guidance and simple techniques to ensure your logo always lands perfectly. We’ll cover the recommended design placements, foolproof methods for finding the center with and without tools, and extra design tips to elevate your apparel game. Invest a few minutes in this guide, and you’ll unlock the secrets to consistently flawless logo placement, saving time, materials, and boosting the overall impact of your designs.
Table of Contents
- What’s the Recommended Design Placements for a Centered Logo?
- #1: Center Chest
- #2: Full Front
- #3: Oversize Front
- How to Locate the Right Centered Logo Placement without Tool?
- #1: Three Finger Rule
- #2: Seam Alignment
- #3: Fold Method
- How to Locate the Right Centered Logo Placement with A Tool?
- Ruler
- Collar Cutout Guide
- Extra Centered Logo Design Tips
- Consider Garment Type and Size
- Be Creative
- Keep Records
- Conclusion
What’s the Recommended Design Placements for a Centered Logo?
The centered logo remains a timeless classic in t-shirt decoration, offering a clean, balanced aesthetic that’s both professional and eye-catching. Its popularity stems from its inherent simplicity and versatility; a centrally placed logo is easily visible, avoids distracting from the garment itself, and provides a strong focal point for your brand or design. But while the concept is simple, achieving the perfect centered placement requires a bit more than just a gut feeling. In this section, we’ll delve into the recommended design placements for a centered logo, exploring various options and considerations to help you achieve the ideal look for your next project (check our our Transfer Placement T-shirt Design Size Chart Guide for more design tips on other placements other than centered Logo).
#1: Center Chest
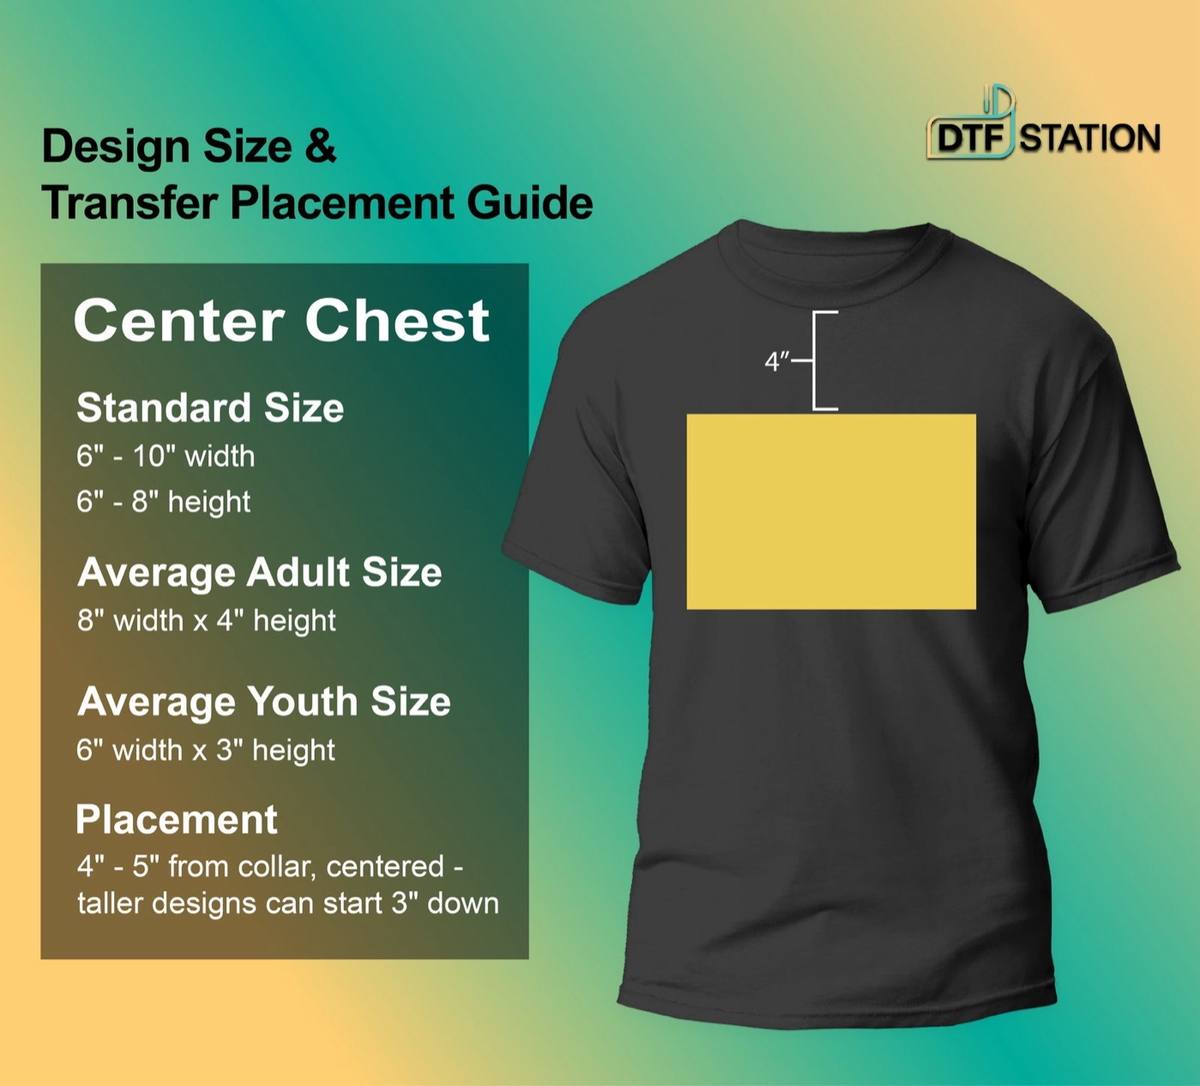 Center-Chest Design Placement
 - Print Location: Center chest
- Print Standard Size: 6″ – 10″ in width; 6″ – 8″ in height
- Average Adult Size: 8″ width x 4″ height
- Average Youth Size: 6″ width x 3″ height
- Placement: 4″ – 5″ from collar, centered – taller designs can start 3″ down
- Tip: Ensure your graphic art is sharp and easy on the eyes. Experiment with additional placements, such as the bottom left or right, for a unique and creative twist.
#2: Full Front
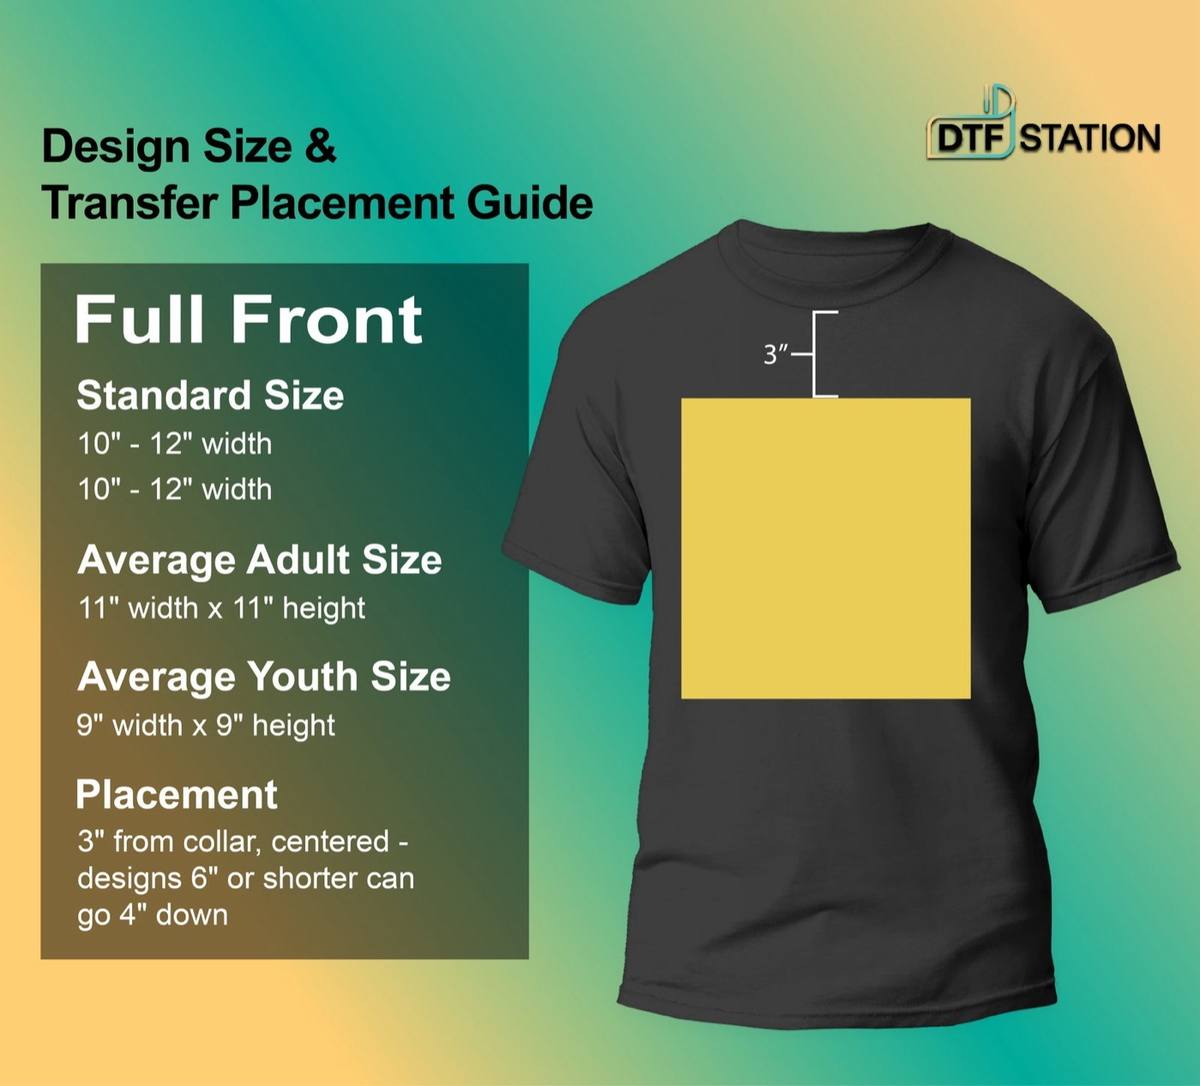 T-shirt Transfer Placement: Full Front
 - Print Location: Full front
- Print Standard Size: 10″ – 12″ in width; 10″ – 14″ in height
- Average Adult Size: 11″ width x 11″ height
- Average Youth Size: 9″ width x 9″ height
- Placement: 3″ from collar, centered – designs 6″ or shorter can go 4″ down
- Tip: Achieve a balanced design by adding a left chest print to the front for a coordinated and polished appearance.
#3: Oversize Front
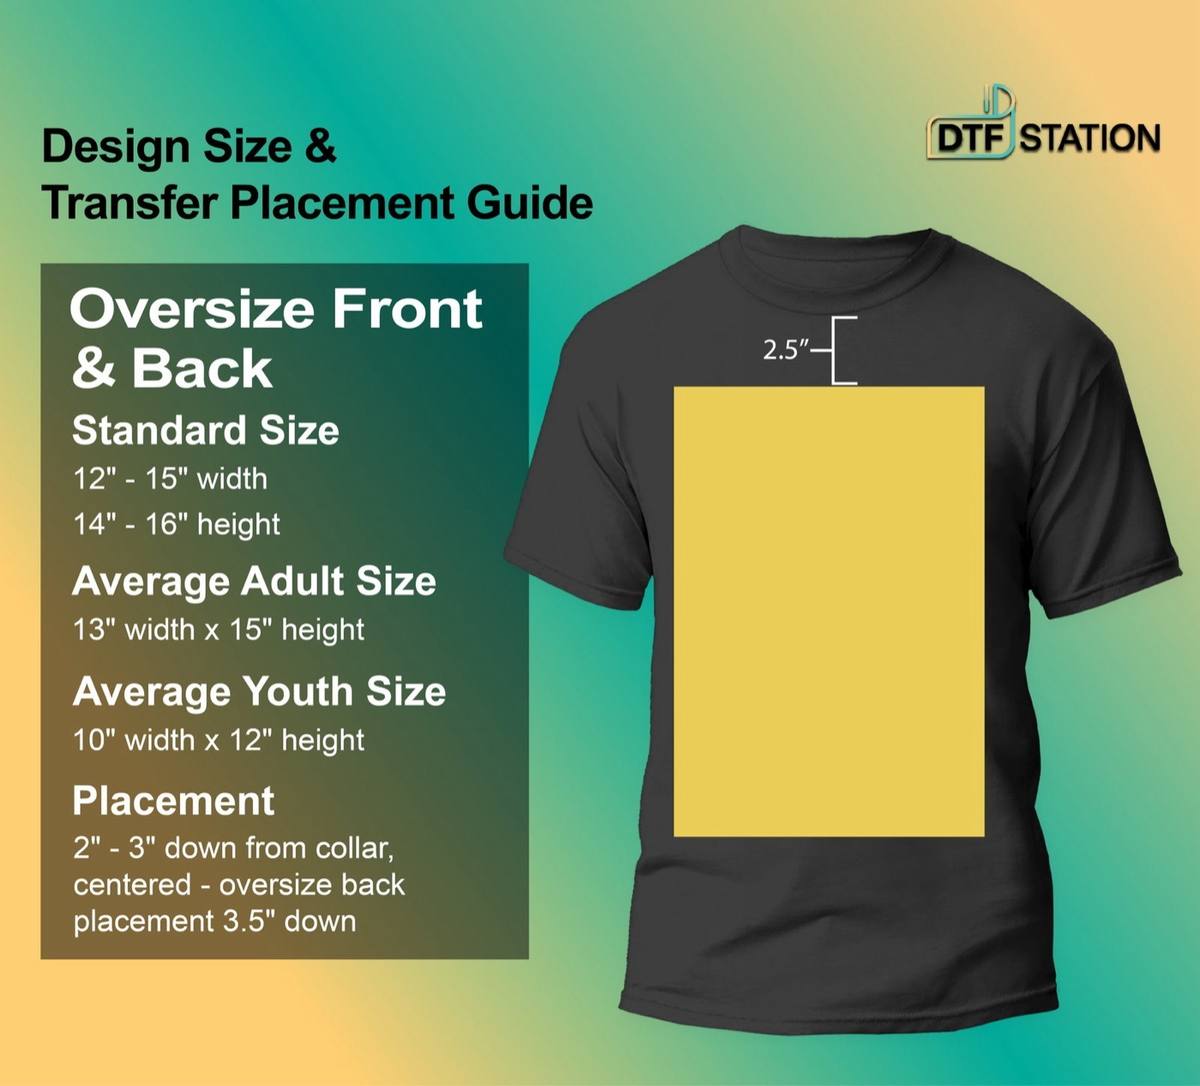 T-shirt Transfer Placement: Oversize Front & Back
 - Print Location: Oversize front/back
- Print Standard Size: 12″ – 15″ in width; 14″ – 16″ in height
- Average Adult Size: 13″ width x 15″ height
- Average Youth Size: 10″ width x 12″ height
- Placement: 2″ – 3″ down from collar, centered – oversize back placement 3.5″ down
- Tip: Make sure your design seamlessly blends with the garment by testing a printed template before making the final decision.
How to Locate the Right Centered Logo Placement without Tool?
#1: Three Finger Rule
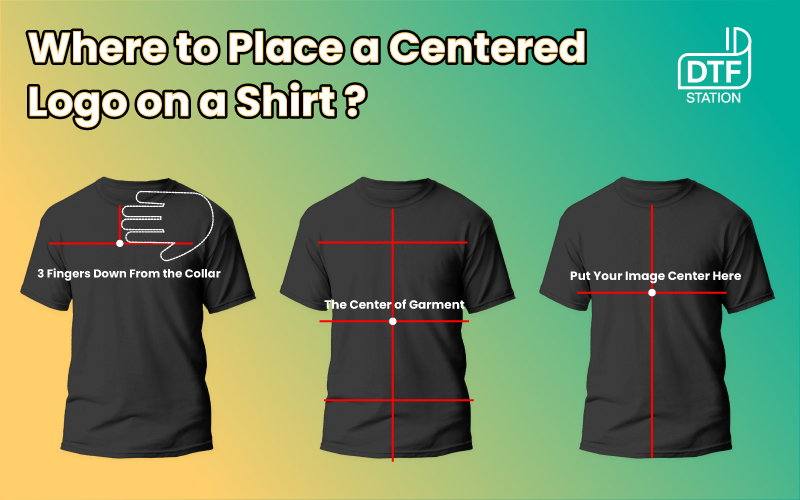
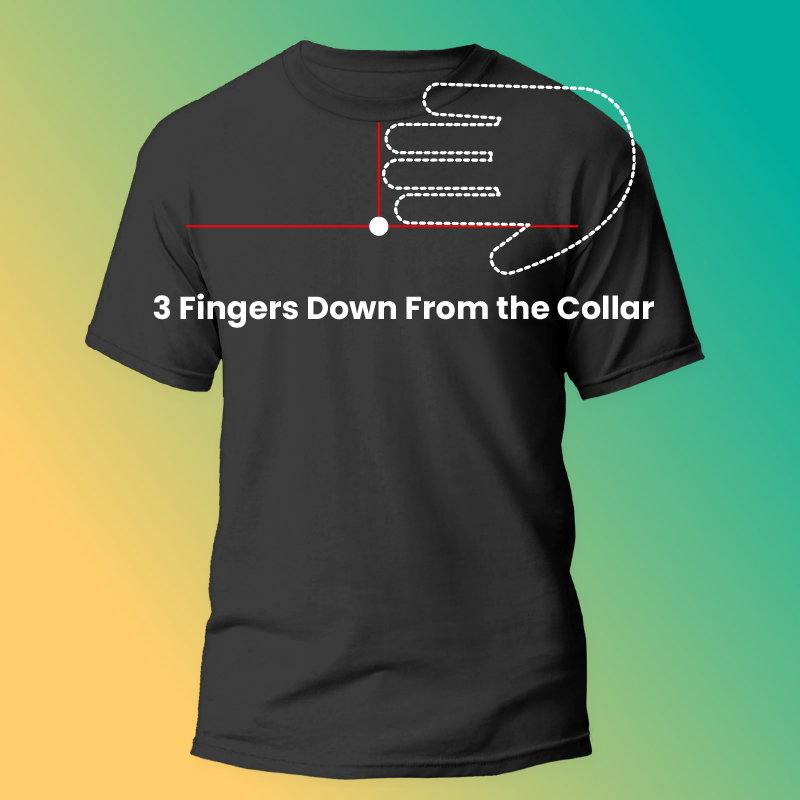
A quick and most popular method for centering a logo on apparel is the “three-finger rule.” Place three fingers below the center of the collar; this generally provides a visually appealing placement.
However, this is an approximation and may need adjustment depending on finger size and garment dimensions; four fingers might be necessary for some items. This hands-on technique offers a fast and convenient way to position your design without requiring additional tools.
#2: Seam Alignment
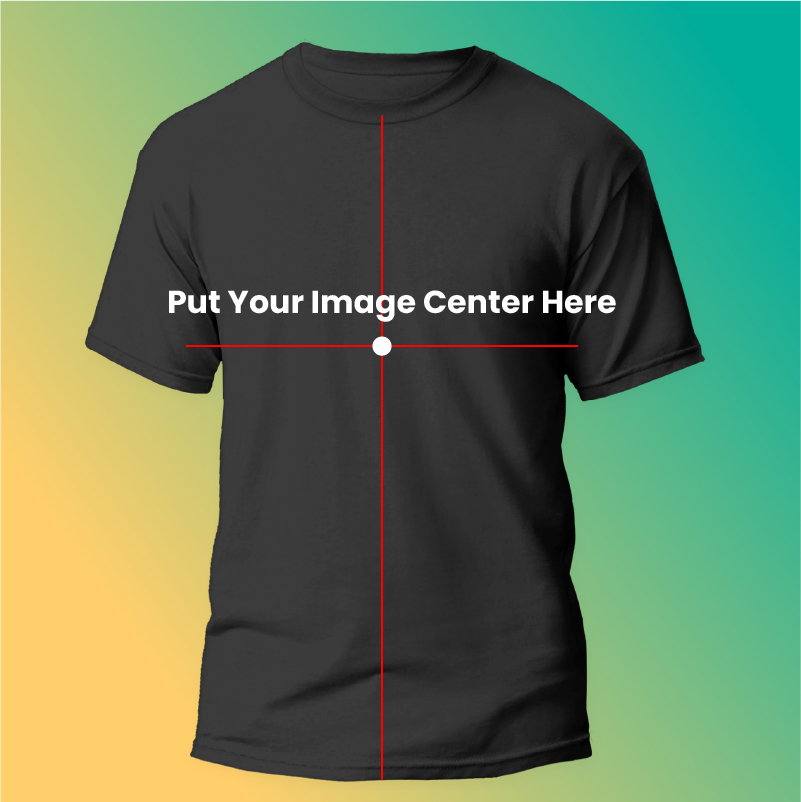
Precise logo placement can also be achieved using seam alignment. First, determine the shirt’s vertical center by drawing an imaginary line from the collar’s midpoint down the garment’s front. Next, locate the horizontal center by drawing an imaginary line across the shirt, connecting the bottom points of both armpits. The intersection of these two lines marks the ideal center for your design, providing a precise placement point without specialized tools.
#3: Fold Method
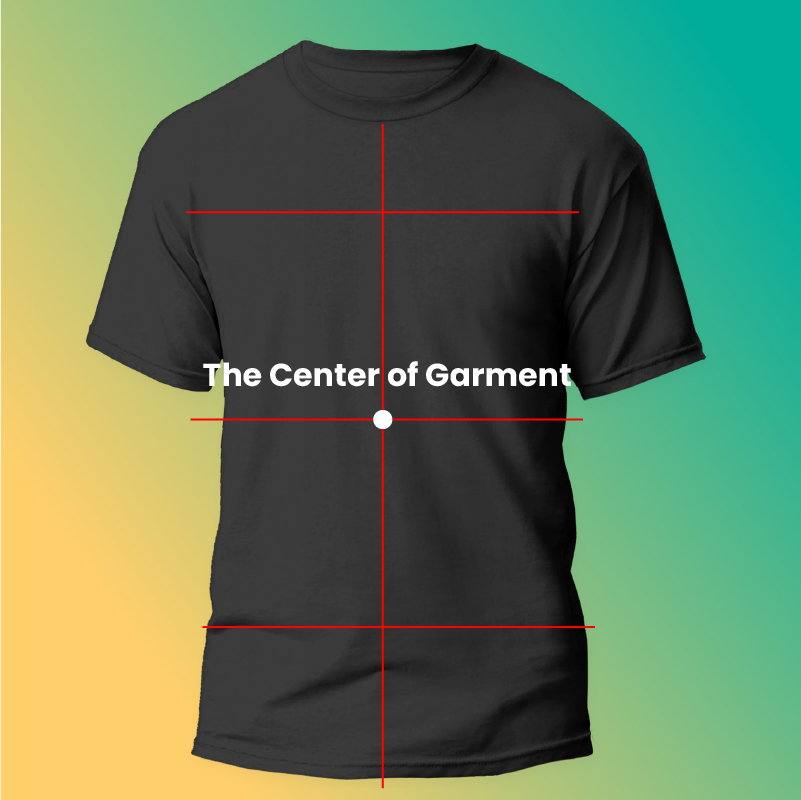
Another way to find the center of a T-shirt is by the fold method. Start by folding the shirt in half lengthwise then again in ½, pinch the center—when you open the shirt you should see a mark in the center. Knowing the center of garment could help with easy placement and alignment of designs and transfers.
How to Locate the Right Centered Logo Placement with A Tool?
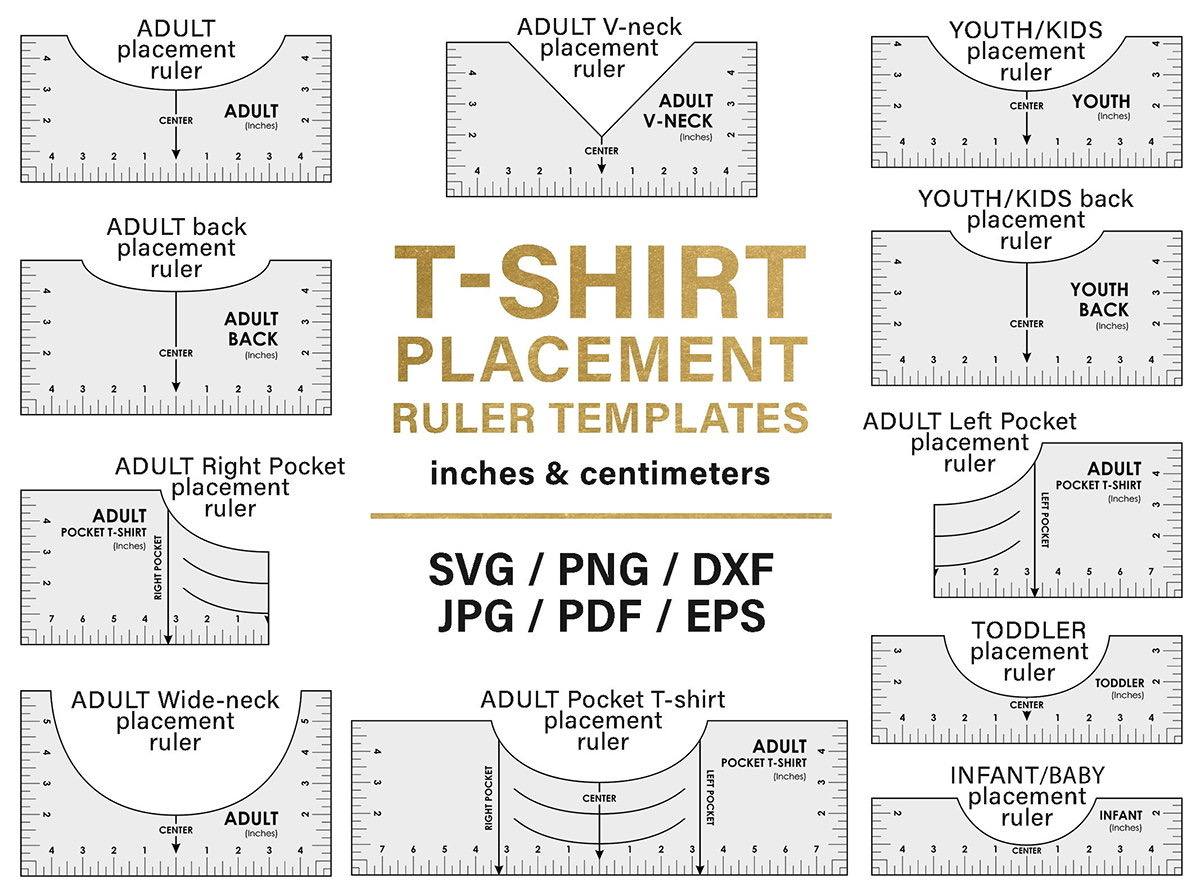
While the three methods previously described—the three-finger rule, seam alignment, and the fold method—provide quick ways to center a logo, they do require some practice and a keen eye for accuracy. For beginners, relying solely on these techniques might lead to inconsistent results. Therefore, using positioning tools is highly recommended, especially in the initial stages of design application. Two popular and effective tools are rulers and collar cutout guides.
Ruler
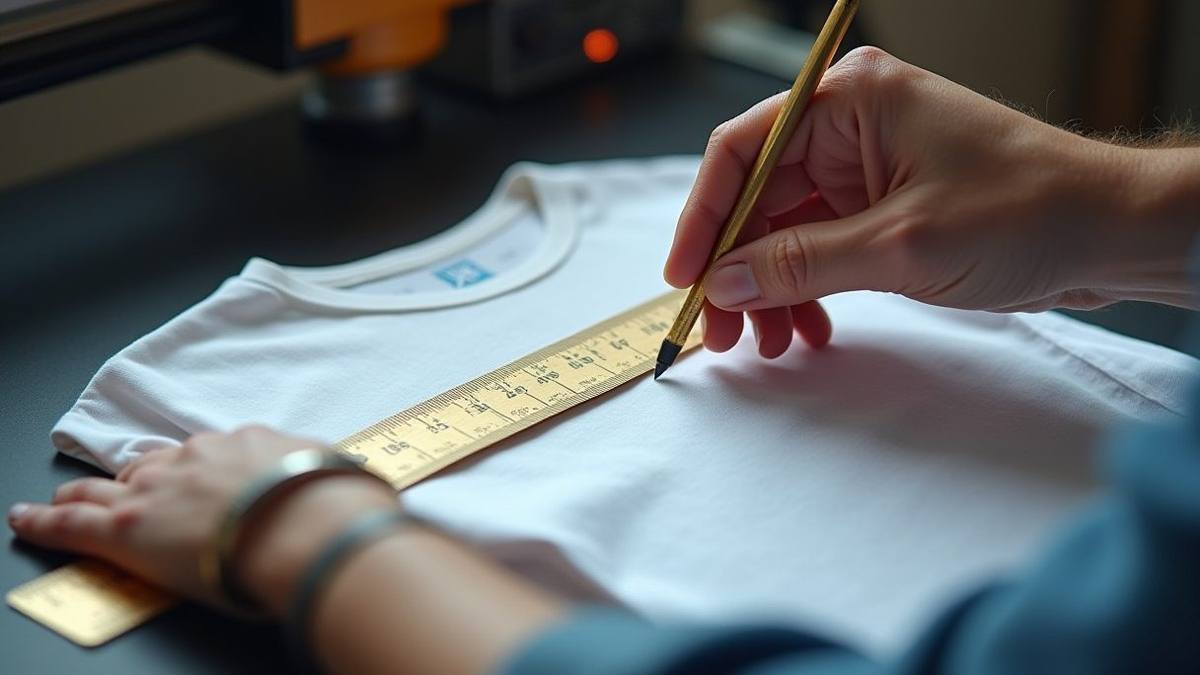
Earlier, we suggested a general guideline of 2-5 inches from the collar center for logo placement, depending on garment size and design. While the three-finger rule is a helpful quick method, using a ruler ensures precise placement and avoids misalignment, especially beneficial for consistent results across multiple garments or when working with intricate designs.
Collar Cutout Guide
Beyond standard rulers, specialized garment industry tools offer greater precision and efficiency for logo placement. A popular example is the collar cutout guide, often sold as a kit containing various templates to accommodate different necklines and desired logo positions. These kits often include multiple guides to suit a range of shirt styles and design preferences. In fact, you may even find free downloadable templates online to create your own collar cutout guide, offering a cost-effective solution for achieving professional logo placement.
Extra Centered Logo Design Tips
By now, you should have a clear understanding of logo placement techniques and how to find the ideal center point on a shirt, whether using quick estimation methods or precision tools. However, remember that these guidelines offer a starting point; flexibility is key in real-world applications. The following tips will further refine your approach and help you achieve consistently professional results that enhance your sales.
Consider Garment Type and Size
Logo placement isn’t one-size-fits-all. The ideal position depends heavily on the garment’s type and size. Oversized tees, for example, may require a different approach than standard sizes; you might need to adjust the “three-finger rule” to four fingers for accurate centering. Even on the same shirt, a small chest logo might use three fingers, while a larger, full-front design demands four. Here’s a quick guide for different shirt styles:
- T-shirts: Aim for the center of the chest, between collarbone and sternum—a classic, highly visible spot.
- Polo Shirts: Center chest works well, but position slightly lower to prevent clashing with the collar.
- Henleys & Button-Downs: Similar to polos; slightly below center chest, ensuring the logo doesn’t cover buttons. Careful consideration of the placket is crucial.
Be Creative
While the guidelines offer a helpful starting point, don’t let them stifle your creativity. Experimentation is key to achieving the optimal aesthetic. The “perfect” centered logo placement isn’t always precisely mathematical; sometimes, a slight offset or unconventional approach yields a more striking result. Consider these creative approaches:
- Play with asymmetry: Instead of strict centering, consider a slightly off-center placement to create a more dynamic and visually interesting look. This works particularly well with bold or unconventional designs.
- Incorporate other design elements: If your shirt features other design elements (e.g., stripes, pockets), consider how your logo interacts with them. Strategic placement can create a cohesive and balanced overall design. A logo might sit perfectly within a stripe, or subtly offset to complement a pocket’s placement.
- Experiment with scale: Don’t be afraid to deviate from standard logo sizes. A smaller logo might feel more refined and subtle, while a larger one can create a bold statement. Test different scales to see what best complements the shirt and the overall design.
- Consider the negative space: The area surrounding your logo is just as important as the logo itself. Experiment with different amounts of negative space to create a visually appealing balance. Sometimes, a little extra space around the logo can make it stand out more effectively.
- Mock-ups are your friend: Before committing to a final placement, create digital or physical mock-ups to visualize different options. This allows you to experiment freely and choose the most impactful design.
By embracing these creative approaches, you can move beyond simple centering and create truly unique and eye-catching designs that elevate your brand and appeal to your target audience.
Keep Records
Maintaining detailed records of your design placement measurements is crucial, especially when using heat transfer methods for bulk orders. Inconsistent placement can lead to wasted materials and dissatisfied customers. A well-organized system ensures consistent results across all garments and orders. Here’s how to effectively keep these records:
- Regularly review and update your records: As you produce more garments and refine your placement techniques, regularly review and update your records to ensure they remain accurate and reflect your current best practices.
- Develop a standardized measurement system: Create a clear and consistent method for recording measurements. This might involve using a template with specific fields for garment type, size, logo dimensions, and precise placement coordinates (e.g., distance from collar, center point, etc.). Using consistent units (inches or centimeters) is crucial for accuracy.
- Utilize digital tools: Spreadsheet software (like Excel or Google Sheets) is ideal for organizing and managing measurement data. This allows for easy searching, filtering, and sorting of records. You can also use design software to create templates that include measurement fields directly on the design itself.
- Include visual aids: Supplement numerical data with visual aids such as photographs or sketches of the placement on sample garments. This provides a quick visual reference, especially helpful when dealing with complex designs or unusual garment shapes.
- Maintain a sample library: Keep a small collection of sample garments with your designs applied. This serves as a physical reference for future orders and helps maintain consistency in placement.
Conclusion
Mastering the art of centered logo placement is crucial for a professional and impactful brand image. We’ve explored various methods, from the quick three-finger rule to precise ruler and collar guide techniques, ensuring you have the tools to achieve perfect results. Remember, even with these guidelines, creativity is key; experiment with placement and size to find what best showcases your design. Ultimately, understanding where should a centered logo go on a shirt is about more than just precision; it’s about making a statement. So, take these techniques, experiment, and create a logo placement that truly represents your brand. Now, go forth and create stunning apparel designs!