
How to Troubleshoot DTF Transfer Adhesion Issues?
Are your DTF transfers not sticking the way they should? Whether you’re a seasoned pro or just starting with direct-to-film printing, dealing with DTF transfer adhesion issues can be frustrating and costly. From prints peeling off after the first wash to uneven adhesion that ruins your design, these problems can leave you scratching your head. But don’t worry—you’re not alone, and there’s a solution!
In this article, we’ll dive deep into the major causes of DTF transfer adhesion problems, including why your dtf transfer is not sticking, and provide actionable steps to fix them. You’ll also discover pro tips to enhance adhesion. By the end, you’ll have the knowledge to troubleshoot like a pro, save time and materials, and achieve flawless, long-lasting prints every time.
If you’re ready to say goodbye to adhesion headaches and hello to professional-quality results, keep reading—this guide is your ultimate resource for mastering DTF transfer adhesion!
Top Causes of DTF Transfer Adhesion Issues
If you’ve ever wondered why your DTF transfers aren’t performing as expected, you’re not alone. Adhesion issues are a common challenge, but the good news is that they’re often caused by a few specific factors that can be easily addressed. In this section, we’ll explore the major causes of DTF transfer adhesion issues. By understanding these root causes, you’ll be one step closer to achieving flawless, long-lasting prints.
1. Poor Quality Supplies and Consumables
One of the most common—and often overlooked—causes of DTF transfer adhesion issues is the quality of the supplies and consumables you’re using. From the DTF film to the powder, every component plays a critical role in ensuring a strong, durable bond.
DTF Powder
DTF powder and ink are specially designed to enhance adhesion to fabric. Inferior materials often lack these key features, and issues like inconsistent particle sizes or clumping can affect how evenly they bond with the ink and fabric.
DTF Film
The most crucial part of DTF film is the color layer, also known as the ink-absorbing layer, which significantly affects the quality of your prints and the success of the transfer process. This is why some films are more expensive than others. Always opt for high-quality, reliable films to ensure the best results.
DTF Ink
While DTF ink plays a crucial role in ensuring strong transfer adhesion, low-grade ink can cause a host of problems. For instance, it may not dry properly, leading to smudging, uneven prints, and poor adhesion to the fabric.
Apart from using low-quality DTF film, ink, or powder, expired or old materials stocked for too long can also cause issues. Over time, these supplies lose their adhesive properties, leading to smudging, weak adhesion, and transfer failures.
2. Printing Process Errors
Printing process errors are a significant contributor to weak DTF transfer adhesion. Several common issues can compromise transfer quality and reduce durability:
-
Common Issues
- Incorrect Printer Calibration
A printer that is not properly calibrated may apply an incorrect amount of ink. Too little ink can result in weak adhesion, while too much ink may lead to smearing or poor curing, both of which reduce transfer strength. Regular calibration ensures precise ink application for optimal adhesion. - Clogged Nozzles or Dirty Print Heads
Blocked nozzles or dirty print heads cause uneven ink distribution, resulting in inconsistent prints that fail to adhere properly. This uneven output affects both the visual quality and the bonding performance of the transfer.
-
Solutions
- Regular Printer Calibration
Calibrate your printer regularly to ensure precise ink application, avoiding under-inking (weak adhesion) or over-inking (smearing). - Clean Nozzles and Print Heads
Clean nozzles and print heads routinely to prevent clogs and ensure even ink distribution for consistent, high-quality prints. - Implement a Maintenance Schedule
Follow a proactive maintenance schedule, including regular cleaning and calibration, to prevent issues and ensure consistent print quality.
3. Problems in Adhesive Powder Application
Adhesive powder application is another factor affecting DTF transfer adhesion. Mistakes in this process could also lead to weak or failed transfers. Here’s how common issues arise in this process and solutions:
-
Common Issues
- Uneven Powder Distribution
Inconsistent powder coverage leaves areas of the transfer without sufficient adhesive, causing poor bonding. This can result in peeling or incomplete adhesion during pressing. - Excess Powder Application
Applying too much adhesive powder leads to clumping, creating uneven bonding and affecting the design’s appearance and durability.
-
Solutions
- Test in Small Batches
Experiment with different powder amounts and application techniques to find the right balance that delivers even coverage and strong adhesion. - Shake Off Excess Powder
After applying powder, gently tap or shake the transfer to remove excess. Ensure only a thin, even layer remains on the inked areas to prevent buildup and poor adhesion. - Use Automated Powder Shaker Systems
Investing in an automated powder shaker and curing system ensures more consistent and even powder application than manual methods. These machines spread adhesive powder uniformly and control the amount applied, reducing human error.
4. Problems in Curing
Curing is where heat is applied to melt and activate the adhesive powder, to create a bond between the ink and the transfer film. If curing is not done correctly, it can directly lead to transfer adhesion issues for several reasons.
-
Common Issues
- Under-Curing
If the powder is not heated to the correct temperature or not cured for long enough, the adhesive does not fully melt or activate. Transfers may peel or lift off during or after pressing due to poor bonding strength in such case. - Over-Curing
Exposing the adhesive powder to too much heat or curing it for too long causes it to burn or become brittle. The adhesive loses its bonding properties, leading to cracked or poorly adhered transfers. - Inconsistent Heat Distribution Cause
Uneven heat application from faulty or improperly calibrated curing equipment can result in some areas being under-cured while others are over-cured. This leads to patchy bonding, where some parts adhere well while others peel off.
-
Solutions
- Follow Curing Guidelines
Always follow the manufacturer’s recommended curing time and temperature for each adhesive powder to achieve optimal results. Under-curing can lead to weak adhesion, while over-curing can damage the transfer, so accurate timing and temperature are key for strong, long-lasting bonds. - Use Reliable Curing Equipment
Invest in curing equipment that features precise temperature controls and even heat distribution to ensure consistent and reliable results. Look for machines with features to prevent uneven curing, which can cause poor adhesion and transfer failure.
5. Lack of Pre-Heat
The pre-heat process is a fundamental step in DTF printing, vital for achieving strong adhesion. It helps by removing fabric wrinkles and eliminating moisture, both of which are crucial for a successful transfer.
- Removes Wrinkles
Pre-heating the fabric removes wrinkles and creases, ensuring a smooth, even surface. Wrinkles can create uneven contact between the transfer and fabric, leading to inconsistent heat and pressure during the transfer process. This can result in poor adhesion, as some areas of the design may not receive enough heat or pressure, leading to weak bonding and peeling. By eliminating wrinkles, pre-heating ensures a uniform surface for the transfer, improving adhesion quality. - Eliminates Moisture in Fabric
Fabrics, especially natural fibers, often contain moisture that can interfere with the transfer process. If moisture is present in the fabric during the transfer, it can cause steam or vapor when heat is applied, preventing proper bonding of the adhesive to the fabric. Pre-heating removes excess moisture, ensuring that the adhesive powder bonds effectively to the fabric, resulting in a stronger, longer-lasting transfer. - Use a Lint Roller to Remove Debris
Before beginning the transfer process, use a lint roller to remove any bits of dust, lint, or other debris from the fabric. These small particles can interfere with the adhesive bond, leading to uneven transfers and weak adhesion. Ensuring the fabric is free of debris helps achieve a smoother, more consistent transfer.
6. Wrong Pressing Settings
Achieving a perfect DTF transfer requires precise control of heat, pressure, and time settings during the pressing process. Even small deviations can lead to issues like incomplete transfers, weak adhesion, or fabric damage. Below are the three key causes of transfer problems and how they impact your results.
-
Common Issues
- Under-Curing
If the powder is not heated to the correct temperature or not cured for long enough, the adhesive does not fully melt or activate. Transfers may peel or lift off during or after pressing due to poor bonding strength in such case. - Over-Curing
Exposing the adhesive powder to too much heat or curing it for too long causes it to burn or become brittle. The adhesive loses its bonding properties, leading to cracked or poorly adhered transfers. - Inconsistent Heat Distribution Cause
Uneven heat application from faulty or improperly calibrated curing equipment can result in some areas being under-cured while others are over-cured. This leads to patchy bonding, where some parts adhere well while others peel off.
-
Solutions
- Follow Curing Guidelines
Always follow the manufacturer’s recommended curing time and temperature for each adhesive powder to achieve optimal results. Under-curing can lead to weak adhesion, while over-curing can damage the transfer, so accurate timing and temperature are key for strong, long-lasting bonds. - Use Reliable Curing Equipment
Invest in curing equipment that features precise temperature controls and even heat distribution to ensure consistent and reliable results. Look for machines with features to prevent uneven curing, which can cause poor adhesion and transfer failure.
7. Wrong Pressing Settings
Not all fabrics are created equal when it comes to DTF (Direct-to-Film) transfers. The texture and treatment of the fabric can significantly affect the adhesion process. Here’s a closer look at why fabric compatibility is a common culprit in transfer adhesion problems:
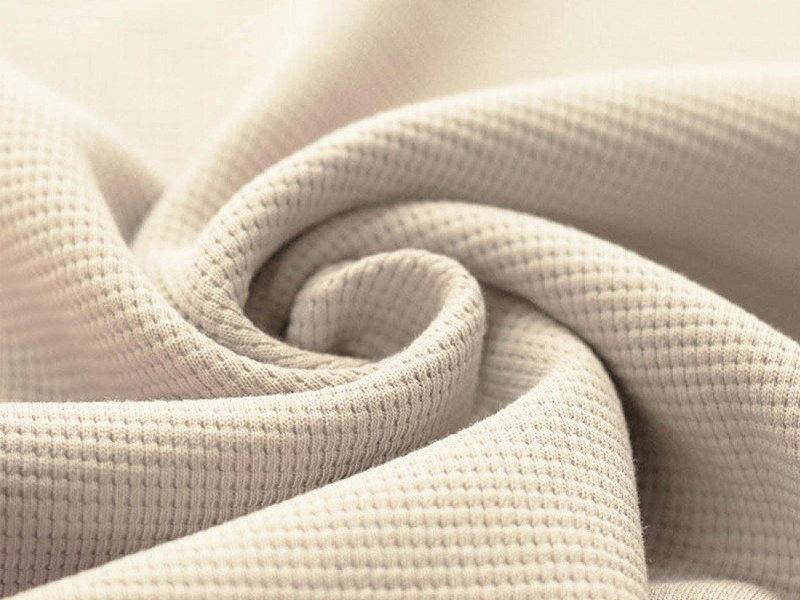
Textured Fabrics
Textured fabrics, such as ribbed materials or waffle-knit thermals, present a unique challenge for DTF transfers. These fabrics have raised peaks and valleys that prevent the transfer from making full contact with the surface. It’s like trying to apply a sticker to a bumpy, uneven surface—those grooves create gaps where adhesion struggles to take hold.
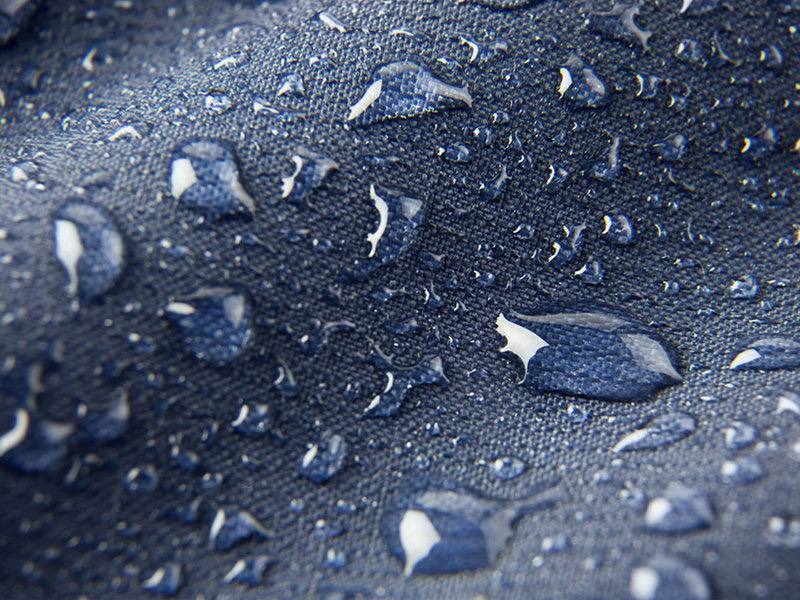
Treated Fabrics
Some fabrics come with protective treatments, such as water-resistant coatings, stain guards, or fabric softeners, which can create a barrier between the transfer and the fabric fibers. These treatments prevent the ink from bonding properly to the material. In some cases, washing the fabric before printing is necessary to remove the protective coatings and ensure a strong, lasting bond.
Best Practice for Perfect DTF Transfer Adhesion
To achieve flawless DTF transfer adhesion, it’s essential to maintain the right conditions and processes. Here are the best practices to help you optimize your workflow and get consistent, high-quality results:
Use Quality Consumables
Use high-quality DTF films, inks, and powders. These premium consumables result in better adhesion, vibrant colors, and prints that last longer, ensuring a professional and reliable end product.
Always Perform Test First
Test on a small, hidden area of the fabric before starting a full production run. This ensures compatibility between the fabric, transfer film, and ink, allowing you to adjust settings and avoid costly mistakes.
Follow Supplier’s Guidelines
Always adhere to the manufacturer’s recommended temperature, pressure, and time settings. This ensures proper curing and bonding, avoiding issues like peeling, fading, or incomplete adhesion.
Maintenance and Calibration
Perform routine maintenance and calibration on your printer and heat press to maintain consistent performance. Regular cleaning and part replacement ensure precise heat and pressure, which are crucial for perfect transfer adhesion.
Store Consumables Properly
Store your DTF supplies in a cool, dry place, away from direct sunlight and extreme temperatures. Proper storage helps maintain the integrity of the materials, ensuring they perform optimally when you’re ready to use them.
Work in Controlled Environment
Maintain a controlled environment with stable temperature and humidity levels. Fluctuating conditions can affect the transfer process, leading to poor adhesion. Keeping the workspace consistent ensures reliable results.
Use Tools Wisely
Utilize tools like heat press pillows and protective pads to help evenly distribute pressure and protect the fabric. These tools are especially useful for pressing irregular surfaces and seams, ensuring consistent adhesion across the entire transfer.
Perform a Secondary Press
After the initial transfer, a secondary press is highly recommended to ensure maximum adhesion. This secondary press, typically done at a lower temperature and for a shorter duration, helps to set the design more firmly into the fabric and increases the durability of the transfer.
Keep Workspacea & Clean
Maintain a clean work area and fabric. Contaminants like dirt, oils, or fabric softener residues can prevent proper adhesion and result in uneven transfers. Ensure the fabric is free of debris before pressing for the best results.
FAQ: Quick Answers to Common DTF Transfer Sticking Problems
Why is my DTF transfer peeling after washing?
Peeling may happen if the transfer wasn’t properly cured or pressed. Try a secondary press after the initial transfer to reinforce adhesion, and make sure to follow recommended heat and pressure settings.
Why isn’t my DTF transfer sticking to dark fabrics?
Dark fabrics require an extra layer of white ink to ensure proper adhesion. If you skip this step or use low-quality white ink, the transfer may not stick well to the fabric. Use light-colored fabrics or adjust settings for dark fabrics by using more white ink.
What can I do if my transfer is not adhering to textured fabrics?
When pressing DTF transfers on unflat textured fabrics, follow these tips for the best results.
- Stretch or Cushion the Fabric: Stretch the fabric over the platen or use a heat press pillow for even pressure.
- Keep Designs Small: Use small logos or minimalistic designs; avoid full prints or intricate lines that may not adhere evenly.
- Consider DTF Patches: Ideal for structured surfaces, like sleeves or chest logos.
These tips help you get the perfect DTF transfer adhesion while preserving fabric texture and design integrity.
Can a protective coating or fabric treatment interfere with adhesion?
Yes, fabrics with water-resistant coatings or stain guards can prevent proper bonding. Ensure that these coatings are removed or that the fabric is compatible with DTF transfers before pressing.
How do I know if my DTF film is the problem?
Low-quality films may not adhere properly, especially after washing. Switch to a premium film and ensure it’s suitable for your fabric type. Also, test with a different batch to see if the issue persists.
Why does my DTF transfer not stick on synthetic fabrics?
DTF transfers may not stick to synthetic fabricsdue to the fabric's coating, heat resistance, or texture. Synthetic fabrics can have coatings that repel adhesives, and they also may not handle the heat required for DTF transfers as well as natural fibers. Additionally, some synthetic fabrics are more prone to dye migration at higher temperatures.
To address common DTF transfer issues, follow these tips:
Pre-treatment: Use a pre-treatment solution designed for synthetic fabrics to improve adhesive bonding.
Temperature & Pressure: Adjust your heat press settings based on fabric type and transfer requirements.
Test Prints: Always test on a small, inconspicuous area before applying the full transfer.
Peel Method: Follow the manufacturer’s recommendation for the correct peel method (hot or cold).
These simple steps will help ensure better transfer adhesion and more successful results.
Conclusion
Troubleshooting DTF transfer adhesion issues is a crucial step to achieving flawless prints every time. By identifying the top causes, implementing best practices, and understanding common sticking problems, you can ensure that your transfers bond effectively and last longer. Whether you’re dealing with fabric compatibility, pressure, or temperature settings, the right approach can make all the difference. Consistent testing and maintenance are key to keeping your DTF printing process running smoothly. For even more tips and solutions, don’t hesitate to dive into our comprehensive guides. Take control of your printing process and start solving your DTF transfer adhesion issues today.